Object Segmentation
In this scenario, we needed to create an Automatic License Plate Recognition (ALPR) system for urban monitoring, specifically to monitor bus lanes. In this document, we will focus on the first phase of the process, which involves processing of data, but also on training and evaluating a segmentation model to extract license plates from the original footage.
Setup CGC environemnt
Let's start with the compute power needed for this task. We want to iterate quickly so an NVIDIA A100 will be the best choice. However if your data set is not bigger then 24GB you will still be able to run non batched training on the A5000. You should consider it when choosing the best price/speed ratio for you.
For this project we created a pytorch environment with an A100 GPU along with a 100GB mounted volume.
cgc volume create your_volume -s 100
cgc compute create nvidia-pytorch -n your_name -g 1 -gt A100 -m 8 -v your_volume
Preparing data
As always we start with unprocessed videos. Videos should be in a format that best suits the toolset of your choice. We mostly rely on opencv and ffmpeg to process video so our files are using the h264 codec in an mp4 container.
Our data set contains videos from a few cameras placed around the city. Where multiple lanes are visible. For neural net training we need images (frames) instead of video (frames glued together).
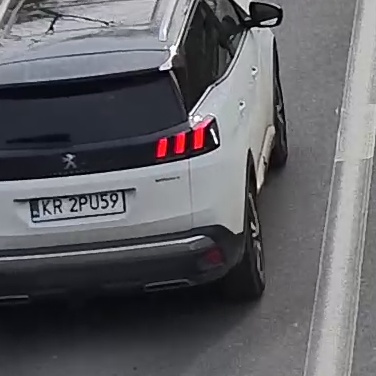
Frames cropping
We are intrested only in bus lanes so the first thing to do, was to cut the frames, so that every image shows only one lane at a time.
Labeling
When we get all our frames stored it's time for the best part! Manual labeling...

Fortunately we have a tool in CGC that makes it easier - Label Studio.
To use it, simply create it:
cgc compute create label-studio -n your_name
After that you can login into the webUI provided by the tool. All neccessery information like the access URL and AppToken can be found here:
cgc compute list -d
Login: admin@localhost
Pass: AppToken provided by cgc compute list -d
Initially we need to create a new project, name it and upload photos as data. Then we choose one of the available labeling setups:
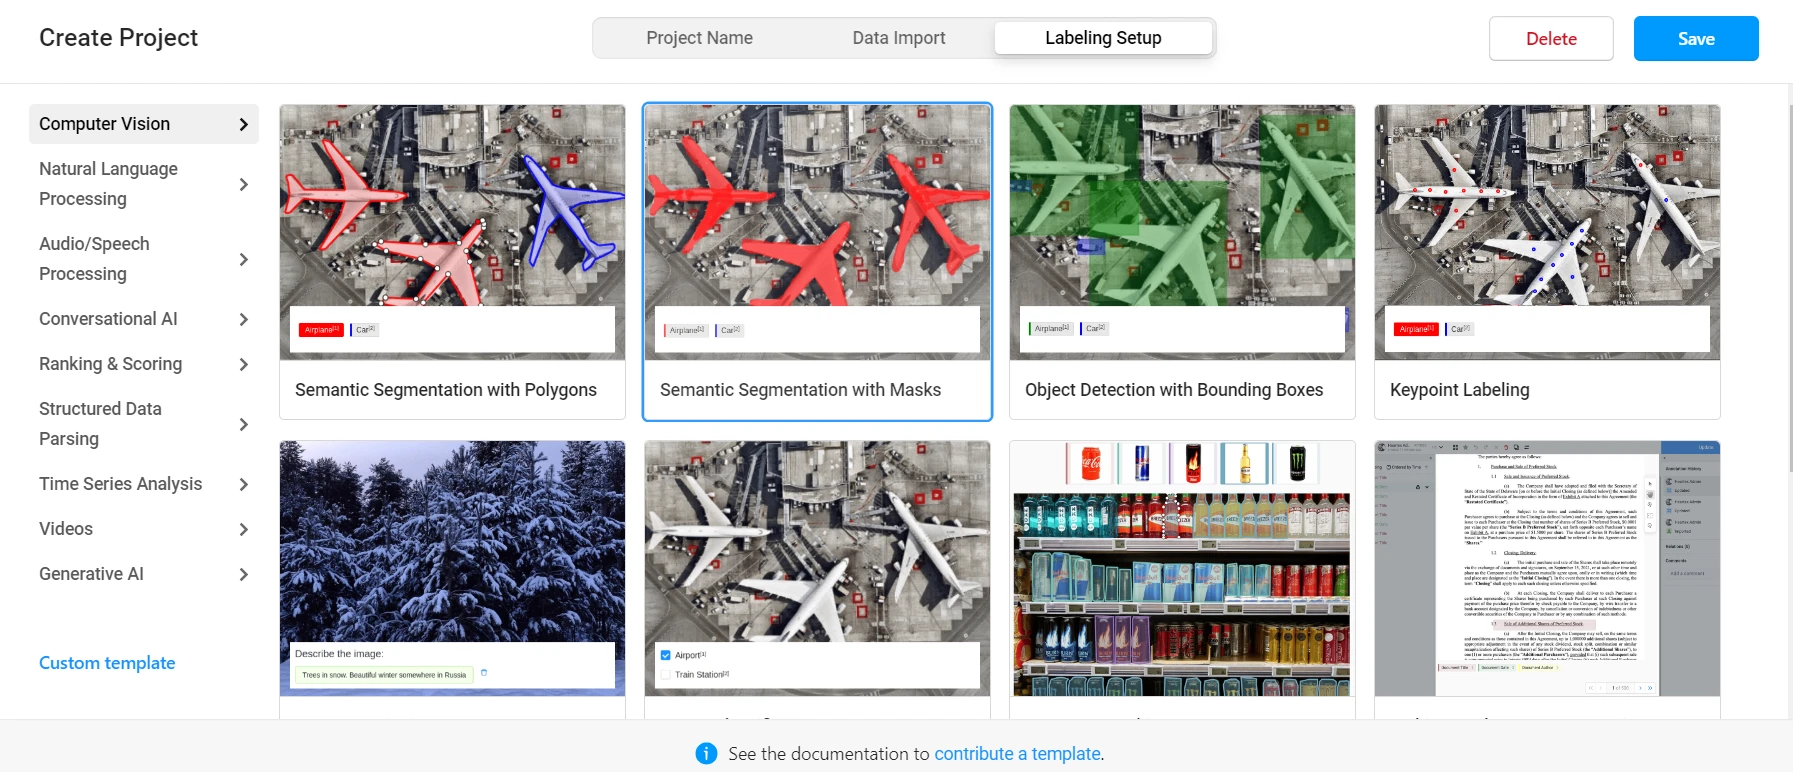
There is a setup for various tasks, but this time we will use Object Detection with Bounding Boxes.
Label Studio only supports uploading 100 images at a time, if you have a bigger dataset, upload them in batches.
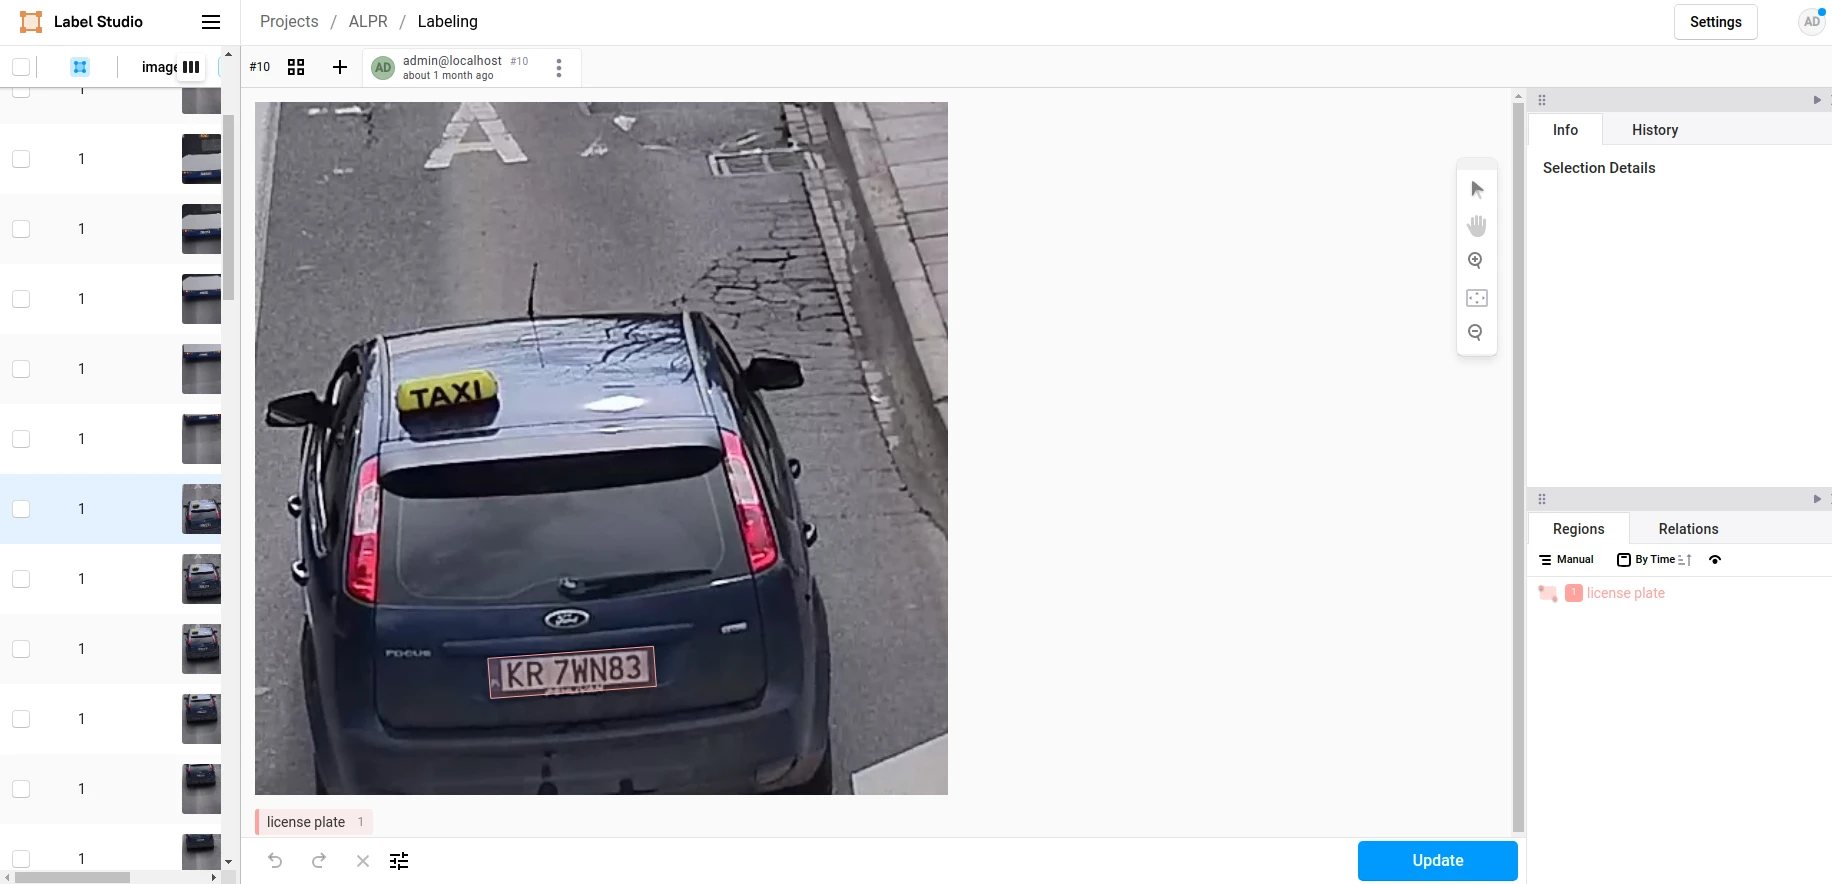
After creating a project you can create any labels you want, in our case only one label was needed - license plate. We annotated every image with bouding boxes around plates.
Exporting data
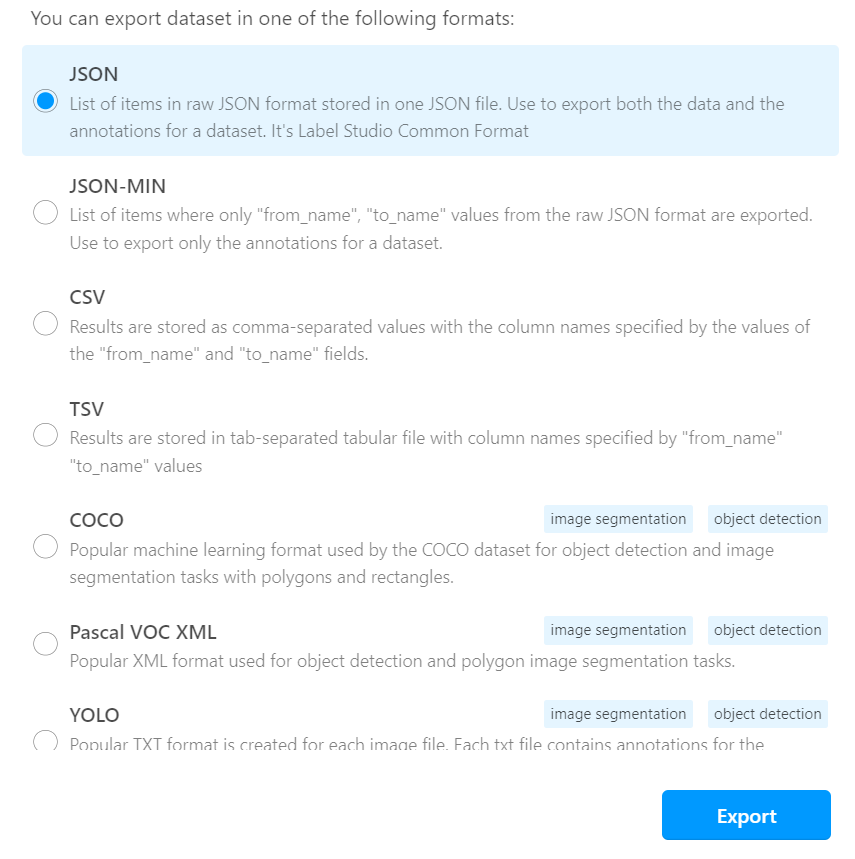
Once the labeling is done you can export the results to your volume, in any format that suits you. We chose the COCO dataformat.
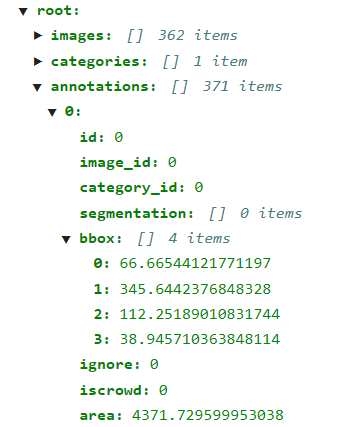
After exporting you will be left with the images folder and the result JSON file. Images are named differently than the uploaded ones, but don't change the filenames, because these names are already written down in the result file. This file is where all your annotations will be placed, depending on the dataformat you choose. In COCO it looks like this:

And every annotation looks like this:
Training
When we have our data labeled it's time for data processing and loading it to model.
Loading data
Before we start training we need to create the dataset and dataloader that will feed images into our model. The code we used for data processing and model training can be found on our gitlab.
Neural networks expect inputs to be in certain format, in this case Pytorch docs explicitly shows us what format is expected:
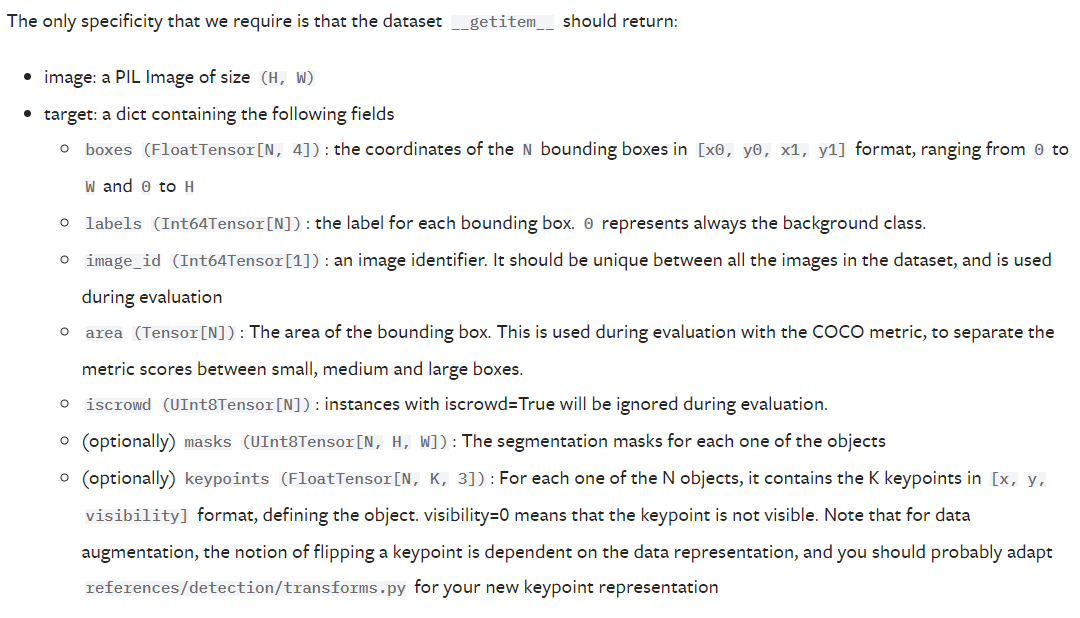
To match this format we created a Dataset class InstanceSegmentationCocoDataset which can be found under plate_segmentation/datasets.py.
root = "/workspace/alpr/"
dataset = alpr.plate_segmentation.datasets.InstanceSegmentationCocoDataset(root = root,
    images_path="data/object_detection/labeled/gopro_short/images/",
    coco_labels_path="data/object_detection/labeled/gopro_short/annotations/result.json",
    transforms=alpr.ai_utils.transforms.get_transform(train=True)
    )
Segmentation training
For segmentation we utilized transfer learning. The base model is fasterrcnn_resnet50_fpn_v2 from pytorch. As we didn't have much data, our best option was to use the default weights and only train the last couple layers. For the predictor to match our task it needed to be swapped with the new one predicting only 2 classes - plate and background.
def get_model_instance_segmentation(num_classes: int, default: bool):
    if default:
        model = torchvision.models.detection.fasterrcnn_resnet50_fpn_v2(
            weights=None, weights_backbone="DEFAULT", trainable_backbone_layers=3
        )
    else:
        model = torchvision.models.detection.fasterrcnn_resnet50_fpn_v2(weights=None)
    num_classes = 2  # class license-plate + background
    in_features = model.roi_heads.box_predictor.cls_score.in_features
    # replace the pre-trained head with a new one
    model.roi_heads.box_predictor = FastRCNNPredictor(in_features, num_classes)
    return model

num_classes = 2
model = segmentation.get_model_instance_segmentation(num_classes, default=True)
num_epochs = 50
engine = AlprSetupTraining(model, dataset, batch_size=2, train_split=0.8)
engine.train(num_epochs=num_epochs, save_path=root+"fasterrcnn_resnet50_fpn_v2.pt")
Inference and Cropping the Plates
Now that we have weights for our trained segmentation model, we can begin inference. In order to recognize characters on plates, we need to pass them to an OCR model (described in a separate tutorial). But we only need the license plate, not the whole image. To crop incoming images, we simply load them into the neural network.
# we begin with unprocessed photos
images = []
root = "/workspace/alpr/"
imgs_path = "frames/"
images_nr = 100
for file in list(sorted(os.listdir(root + imgs_path)))[:images_nr+1]:
    try:
        images.append(Image.open(root+imgs_path+file).convert("RGB"))
    except Exception as err:
        print(f"Cant open {file}, {err}")
Segmentation Network in action:
# setup the cropping of license plate
# we will use our trained model, but you can use whatever model you want as long as its detector predicts 2 classes - plates and background
model = segmentation.get_model_instance_segmentation(num_classes=2, default=True)
cropper = segmentation.PlateCropper(model=model, images=images)
cropper.load_state_dict(path_to_weights=root+"fasterrcnn_resnet50_fpn_v2.pt")

plates, scores = cropper.crop_plates(score_threshold=0.9995)
Showing plates detected from subsequent frames:
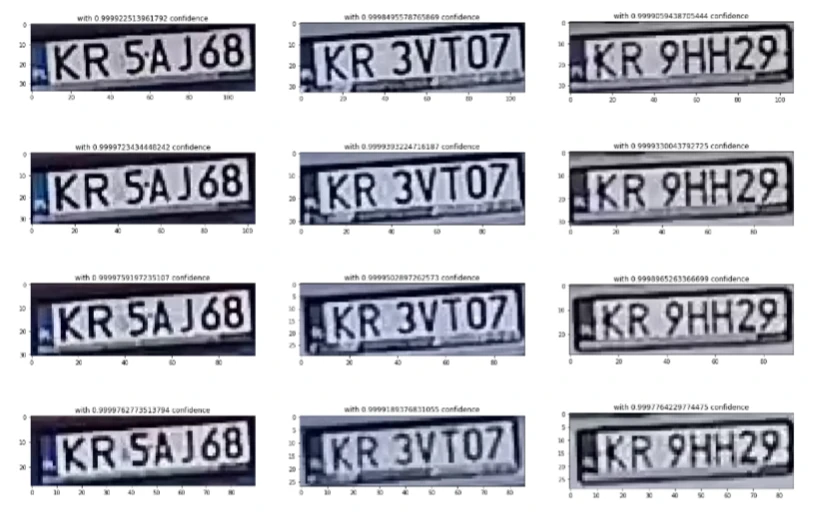
And there you have it!